
Image-Stabilized Binoculars for Concerts: Which Magnification to Choose by Distance, With Amazon Models
Choose image-stabilized binoculars by the distance from your seat, the weight you can hold and the field of view. This article uses 8x, 10x and 12x as editorial starting points for comparison. They are not venue requirements or a guarantee of seeing a face clearly. Try a candidate through a shop or rental if possible.
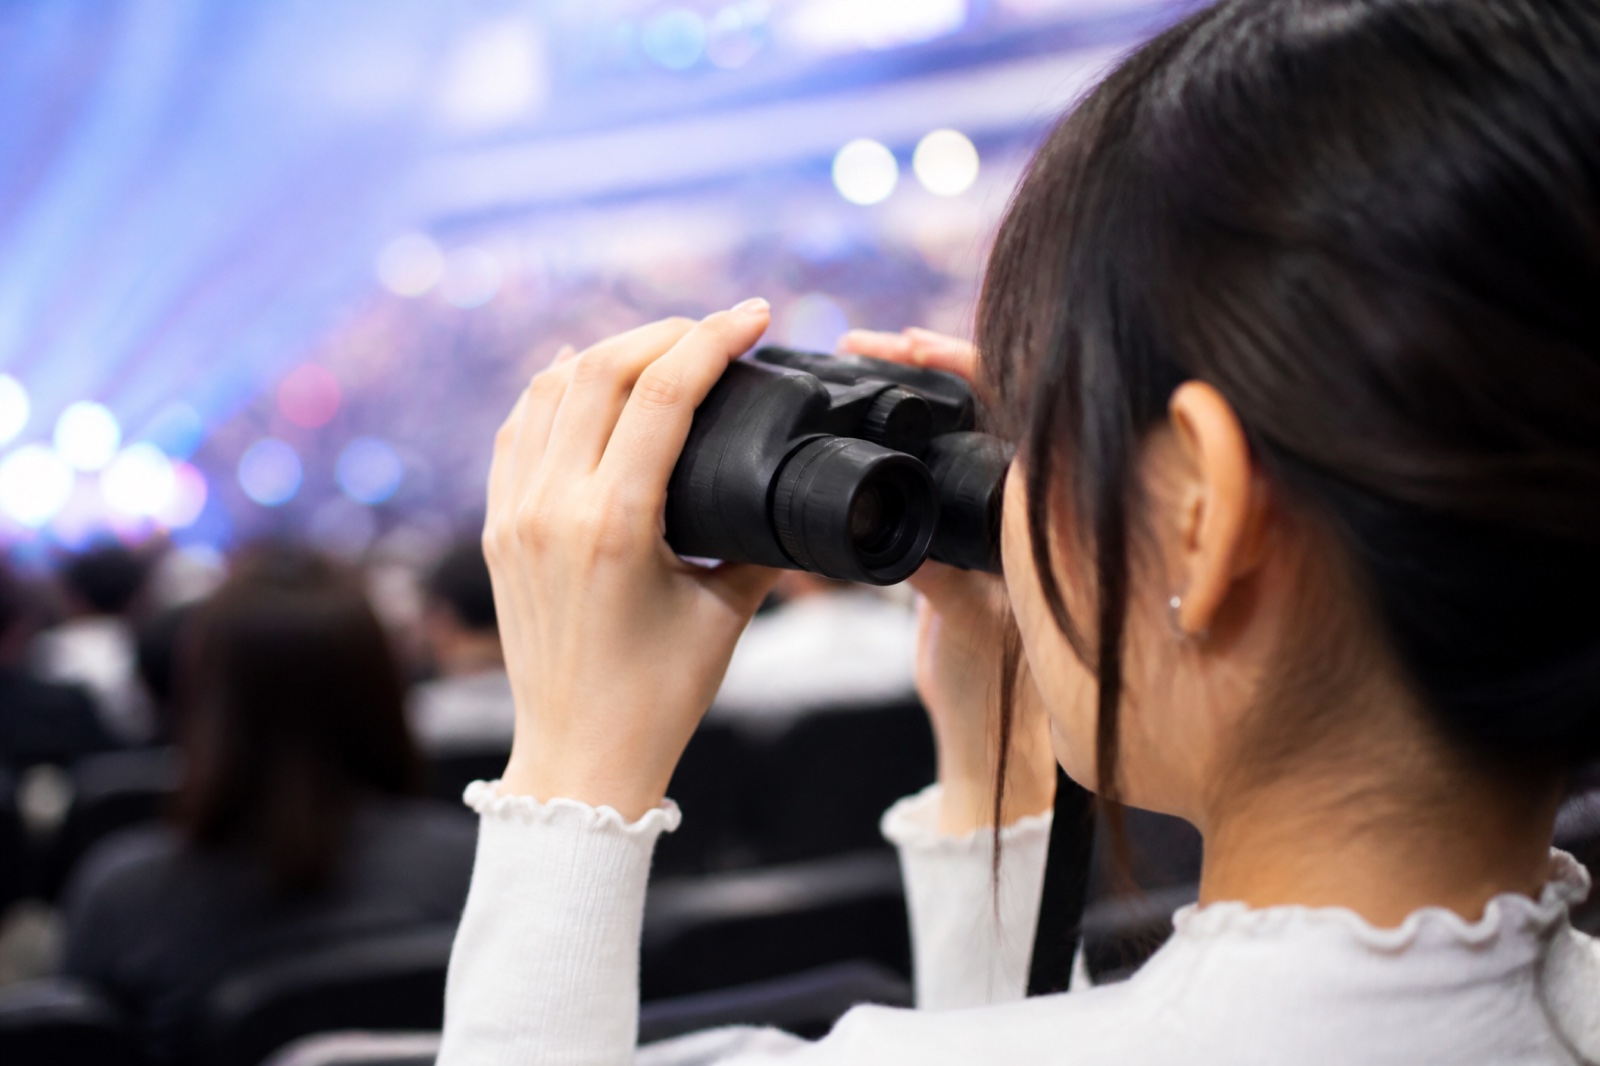
What Are Stabilized Binoculars?
Stabilized binoculars are binoculars that use an internal mechanism to correct small hand movements, so distant subjects look steadier and are easier to see. In English this is called image stabilization, and product names use terms like “IS,” boushin (anti-vibration) or “camera-shake correction.”
Ordinary binoculars also make a subject look bigger, but the higher the magnification, the bigger the shake looks too. With stabilization on, it’s easier to keep your eyes on a face, on fine dance movements, or on the pattern of a costume. The view doesn’t become perfectly still, though, and stabilization can’t compensate for darkness, haze, stage lighting or the performer’s own motion.
Examples of Use
- “I’m in the upper tier at Tokyo Dome, so I want to check the seating chart to see whether 10x or 12x stabilized binoculars suit me.”
- “The first time I borrowed stabilized binoculars, it was easier to follow facial expressions than with ordinary binoculars.”
- “I’m at the back of the arena, so I put stabilization performance and the easy view of 10x ahead of light weight.”
Quick Reference: Choosing Magnification by Distance
You can think of the feel of magnification as actual distance ÷ magnification. Look at something 80 m away through 10x binoculars, for example, and it appears about as large as something roughly 8 m away to the naked eye. This is a simple calculation for grasping apparent size, not a guarantee that a face will be sharp.
| Actual distance | Feel at 8x | Feel at 10x | Feel at 12x |
|---|---|---|---|
| 20 m | about 2.5 m away | about 2 m away | about 1.7 m away |
| 40 m | about 5 m away | about 4 m away | about 3.3 m away |
| 60 m | about 7.5 m away | about 6 m away | about 5 m away |
| 80 m | about 10 m away | about 8 m away | about 6.7 m away |
| 100 m | about 12.5 m away | about 10 m away | about 8.3 m away |
| 120 m | about 15 m away | about 12 m away | about 10 m away |
Higher magnification enlarges your oshi, but usable field of view varies by model. Read the stated field rather than judging from magnification alone. An 8x–10x model can be a comparison starting point for a whole group or dancing, and 10x–12x for following one person at a distance. Actual lighting, your eyes and the particular product still matter.
Close seatsFar seats
- 8xWithin about 40 m, or fast-moving shows
- 10xThe baseline when you cannot read your seat
- 12xBeyond about 80 m, to follow one person
Editorial comparison guidance, not a venue requirement or a promise of a clear view.
Guide by Venue and Seat
The distances below are rough estimates by our editorial team, meant to keep you from choosing a magnification by venue name alone. Even within one venue, the distance to your oshi changes with a center stage, a runway, or a stage that surrounds the audience. Once the seating chart for your show comes out, go by that.
| Venue and seat | Rough distance to stage | Suggested magnification | How a beginner should think about it |
|---|---|---|---|
| Live house, small hall | 10 to 30 m | 6 to 8x | Prioritize a wide field of view that makes it easy to follow the whole body and movement |
| Back of a hall, front of an arena | 20 to 50 m | 8 to 10x | 8x if close; 10x if you can’t read the seat |
| Back of an arena, middle of the stands | 50 to 80 m | 10x | Balances size and ease of following |
| Upper tier of a large arena, far seats on a dome’s lower level | 70 to 100 m | 10 to 12x | 10x for the whole picture, 12x to focus on expressions |
| Upper tier of a dome, opposite side from the stage | 100 to 150 m or more | 12x | Check the model’s actual field and brightness; also consider the venue’s screens |
Why Distance Changes Even Within the Same “Arena”
- Yokohama Arena uses its stage and seating differently from show to show. Unless you check even the orientation of your seat in the official seating guide (in Japanese), the name “arena seat” alone won’t tell you how close you are.
- GMO ARENA saitama (Saitama Super Arena) has different venue modes. Its official seating guide can help identify layouts. As of this article’s November 2026 update, the main arena is closed for renovation with an April 2027 reopening planned (Saitama Prefecture announcement, Japanese). Read the event’s own layout and operating information rather than assuming an old seating diagram applies to a future show.
So it’s premature to settle on “Yokohama Arena, so 10x” or “Tokyo Dome, so 12x.” At shows where a runway comes close to you, 10x, which makes it harder to lose your oshi, can be easier to use than a far-seat 12x.
An Official Layout Example: Yokohama Arena’s A Pattern
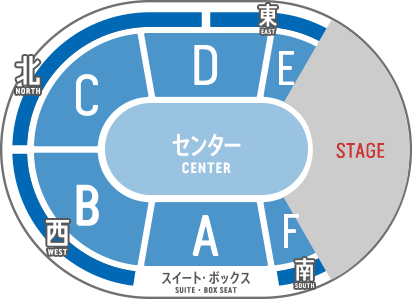
The diagram labels the middle “Center,” places areas A–F around it and shows a stage at one end. Even within a named area, distance and viewing direction change with position. This is an example layout, not a promise about a particular concert. If a performance adds a central stage or runway, your distance to a performer changes. The diagram has no distance scale, so it cannot establish an exact number of meters from a seat.
Three Steps to Find Your Distance From Your Seat
- Look at the seating chart for your show. Check the organizer’s guidance, the seat display on your e-ticket, and postings at the venue.
- Lay it over the venue’s official seating chart. From the floor, gate, row and block, work out your orientation to the stage.
- If you can’t read the distance, use 10x as the baseline. Lean toward 12x only when you know you’re in the upper tier or on the opposite side, and you’ll avoid too much magnification.
- 01Show-specific chartOrganizer guidance, e-ticket, venue postings
- 02Overlay the venue chartFloor, gate, row and block
- 03Cannot read it? Use 10x12x only for upper or far-side seats
Start with the show's own seating chart, not the venue name.
If you buy before seats are announced, 10x is the easiest to handle as a first pair. 8x suits close seats and fast-moving shows, and 12x suits far seats where you want to watch one person for a long time.
Specific Models Easy to Compare on Amazon
These are comparison candidates, so that beginners can search by the right model number. It’s not a ranking but a starting point for comparing magnification, objective lens diameter and size. Amazon’s stock, prices and sellers change, so recheck the model number and warranty terms at each link (Amazon Japan).
| Who it’s for | Model to search on Amazon | Basic specs | What to watch when choosing |
|---|---|---|---|
| Wants light weight; mostly halls and arenas | Vixen ATERA II H10×21 | 10x, 21 mm objective | Being compact, it’s worth comparing in dark venues against a 10×30 |
| A 10x model to use as your baseline if in doubt | Canon 10×30 IS II | 10x, 30 mm objective | Check body size and weight, and how the button is pressed |
| Wants to compare outdoor shows and water resistance | Kenko VC Smart 10×30 CellartoII WP | 10x, 30 mm objective | Check waterproof conditions, batteries and warranty coverage in the product description |
| Often in upper arena tiers or far dome seats | Vixen ATERA II H12×30 | 12x, 30 mm objective | Compare the actual field with a 10x model and try following a moving subject |
| Far seats, and brightness matters too | Canon 12×36 IS III | 12x, 36 mm objective | Larger and heavier, so check whether you can hold it for a long time |
Amazon sometimes lists similar product names and older models in the same search results. Before you press the buy button, check these five points:
- Whether the model number, such as “10×30” or “12×30,” is the one you want
- Who the seller and shipper are
- Whether it’s covered by a domestic warranty and comes with a warranty card
- Whether the weight includes batteries, and whether the batteries it needs are included
- Whether the return terms after opening and the contact for initial defects are stated
Don’t decide on price alone. Cross-checking specs on the Vixen binoculars product page, the Canon binoculars product page and the Kenko Tokina binoculars product page (all in Japanese) cuts down the mix-ups with older models or different magnifications that look like the same name.
An Official Product Photo Shows the Controls to Check
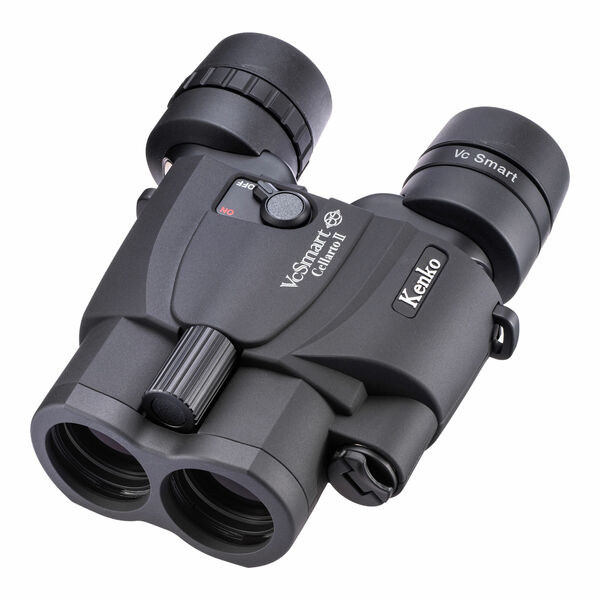
The photo shows where your eyes and fingers meet the instrument: the eyepieces, central focus ring and upper controls. A model number cannot show whether those controls feel comfortable in your hands. Test the grip, ability to focus and access to the stabilization switch together.
Kenko’s official page describes automatic stabilization-mode selection, an on/off slide switch and one AA alkaline battery for this model. It also states that the auto-power-off feature has been removed. Do not assume a pair will switch itself off; practice turning it off when packing it away. The earlier VC Smart 10×30WP is marked as discontinued on its manufacturer page; do not confuse it with the CellartoII WP version.
Weight labels also need qualifications. Vixen lists the ATERA II H10×21 at 358 g excluding batteries and silicone eyecups, or 372 g with the eyecups but without batteries (official specifications). Canon lists the 10×30 IS II at approximately 600 g excluding batteries (official specifications). These are different lens-size models, not a ranking of optical quality. Compare what is included in each weight, then try the complete setup you will carry.
What Do Numbers Like “10×21” and “12×30” Mean?
The first number is magnification; the second is the diameter of the objective lens that takes in light. For example, 10×30 means “10x, 30 mm objective.”
A good starting point for comparing how easy they are to see in dark venues is exit pupil = objective diameter ÷ magnification.
| Notation | Exit pupil | Rough characteristics |
|---|---|---|
| 10×21 | 2.1 mm | Easier to make lightweight, but compare with 30 mm models in the dark |
| 10×30 | 3.0 mm | Balances brightness and portability |
| 12×30 | 2.5 mm | Shows distant subjects larger while keeping the body compact |
| 12×36 | 3.0 mm | Combines distance and brightness, but tends to be larger |
A larger exit pupil isn’t always the better choice. How things look also varies with the lenses and coatings, venue lighting, your own pupils and your seat position. Use the numbers to narrow down candidates, and if you can, look through the binoculars yourself in a store or through a rental.
Six Things Beginners Should Check Besides Magnification
Your binocularsMagnification is only the start
- WeightCan you hold it for minutes?
- Field of viewWider is easier to follow
- GlassesCheck eye relief
- Stabilization switchHold or press-once
- BatteriesType, runtime, spares
- Waterproofing and rulesOutdoor shows, carry-in limits
Tested in a shop or through a rental, these matter more than a spec sheet.
1. Weight
On the product page, check whether the listed weight includes batteries. In a store, don’t just hold the binoculars for a few seconds; see whether you can hold them up to your eyes with both hands for several minutes. If you choose a heavy model, plan on resting it: lower it between songs, or use a strap that shifts the load to your shoulder instead of your neck.
2. Width of the Field of View
The wider the field, the easier it is to find your oshi in the middle of a dance, or a performer crossing the stage. If you tend to lose your subject at 12x, dropping to 10x may actually lengthen the time you spend watching.
3. Compatibility With Glasses
If you wear glasses, check the “eye relief.” Don’t decide by the number alone. Try the binoculars with the eyecups folded down and see whether you can see to the edge of the round field, and whether your eyelashes or glasses touch.
4. How the Stabilization Switch Works
Some models work while a button is held, others stay on after a switch is set, and some stop after a set time. Read the particular model’s instructions. Check whether it’s tiring to keep pressing during a show, and which hand you can operate it with more easily.
5. Batteries and Continuous Use Time
Look at the battery type, replacement method and whether an auto-off function exists. Don’t put the batteries in for the first time just before the show. Fit them and test the binoculars at home, and keep spare batteries in a case where the terminals won’t touch other metal.
6. Water Resistance and Carry-In Rules
For outdoor shows, check waterproofing and operating temperature. Indoors or out, carry-in size and usage rules differ by show, so follow the organizer’s notes first.
How Stabilization Works and What It’s Called
“Boushin sougankyo” is a general term for the use. Names vary by maker: “IS binoculars,” “camera-shake correction binoculars,” “binoculars with stabilization.” The internal methods differ too, in how prisms or lenses are moved, how shaking is detected, and how long the stabilization stays active.
The idea of shake correction, developed in the camera field, is also used in binoculars, and their use has spread to concerts, sports viewing and birdwatching. However, there is no unified standard called “for concerts.” Rather than ranking by release year or method alone, it’s more practical to choose to fit the venue, your seat and the weight you can carry.
The Option of Renting Before You Buy
For a first time, you can wait until you know your seat, then rent 10x and 12x models and compare them. When renting, check not only the total cost but also the pickup date, return deadline, damage coverage, spare batteries and how to send it back.
When the binoculars arrive, don’t take them straight to the show. Practice at home first, on a sign or building you can safely see from a window:
- Set the distance between the eyepieces to fit your eyes.
- Adjust the focus and diopter.
- Operate the stabilization switch without hesitating.
- Find the subject with the naked eye before bringing the binoculars up to your eyes.
- Lower them every 30 seconds, then find the subject again.
Even this practice alone cuts down on the classic failure: plenty of magnification, but you can’t find your oshi.
Using Them at the Venue and Etiquette
Set the eyepiece width, focus and diopter before the show starts. Adjusting after the lights go down can make you miss the opening staging or bump an elbow into your neighbor.
While using them, don’t lift the binoculars above your head; hold them between chest and eye level. Don’t lean out into the aisle, and lower the binoculars at song breaks or during the MC to rest your arms and eyes. At shows where photography is banned, don’t hold a smartphone up to the binoculars either, and follow the organizer’s guidance.
Notes From The Oshi Lab: Guide People by Seat Distance, Not Magnification
Stabilized binoculars are a product that “brings the distant close,” but magnification alone doesn’t decide satisfaction. If venues can tell fans the stage layout for each show, the approximate distance from their seat and which viewing aids may be brought in, fans can avoid choosing more magnification or larger equipment than they need.
Retailers and rental services should ask about distance, viewing time and carrying weight rather than recommending higher-end models on magnification alone. Comparison tables can include weight, field of view and opportunities to try equipment, helping fans assess options for their own viewing preferences.
Related Terms
Genba / Sansen / Kamiseki (great seats) / Penlight / Live-show ensei
FAQ
Should my first stabilized binoculars be 8x, 10x or 12x?
As an editorial comparison starting point when your seat is unknown, consider 10x, because it balances image size with how easy it is to follow your subject. If the stage is within about 40 m, 8x works. For upper-tier seats or far dome seats more than about 80 m away, 12x is also a candidate.
What magnification do I need for a live show at Tokyo Dome?
There's no single answer, because even at Tokyo Dome the distance changes a lot with the stage position and your seat. As a guide, use 10x for the lower level and arena, and 12x for the upper tier or the side opposite the stage. Compare the event's own seating chart with Tokyo Dome's official seating guide (in Japanese).
Which stabilized binoculars should I search for on Amazon?
For light weight, try the Vixen ATERA II H10×21. For a standard 10×30, compare the Canon 10×30 IS II and the Kenko VC Smart 10×30 CellartoII WP. For far seats, compare the Vixen ATERA II H12×30 and the Canon 12×36 IS III. Prices and stock change, so check the model number, seller, warranty and weight on the product page, not just the product name.
Can I use stabilized binoculars while wearing glasses?
Yes, but your glasses put distance between your eye and the eyepiece, so models with short eye relief can make the edges of the view hard to see. Before buying, look through them with your glasses on and check that you can see the whole round field of view with the eyecups folded down.
Is it better to buy or rent stabilized binoculars?
For a first time, or a few uses a year, you can rent 10x and 12x models and compare them. If you plan to use them at several shows and already know the weight and controls you like, buying makes more sense.


